
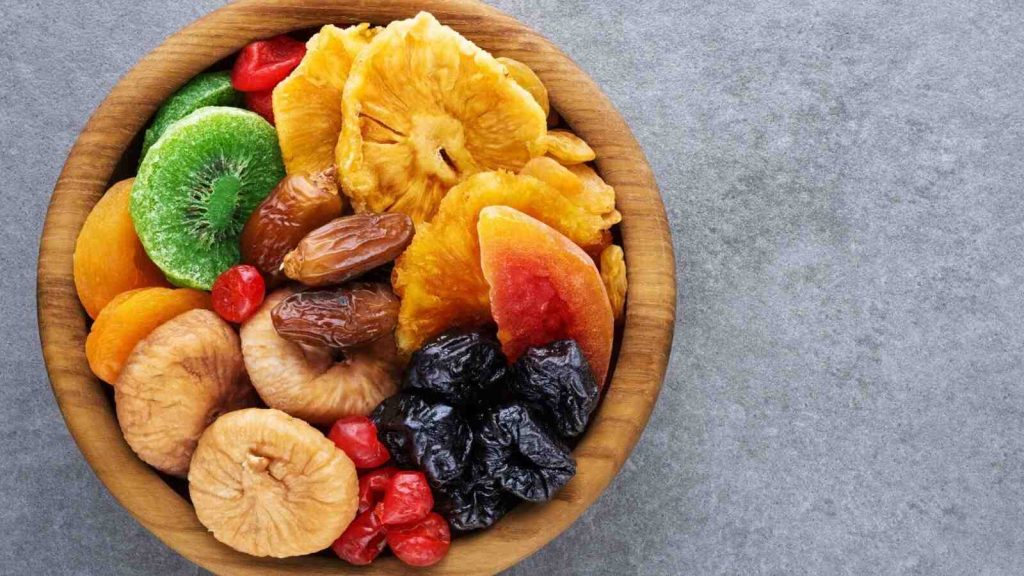
Introduction:
Recipes For Dehydrated Foods is one of the oldest methods of food preservation, allowing for extended shelf life without refrigeration. Beyond the practicality, dehydrated foods retain nutrients, intensify flavors, and provide versatility in the kitchen. If you’re looking to explore creative ways to incorporate dehydrated foods into your meals, here’s a guide featuring exciting recipes that range from savory snacks to hearty meals.
Benefits of Dehydrating Food
Before diving into the recipes, it’s essential to understand the benefits of dehydrating food:
Extended Shelf Life: Properly dehydrated food can last for months or even years.
Nutrient Retention: Dehydration preserves most nutrients, especially vitamins and minerals.
Portability: Dehydrated foods are lightweight and compact, making them ideal for camping, hiking, or meal prepping.
Enhanced Flavor: The dehydration process concentrates flavors, offering intense taste in every bite.
1.Dehydrated Apple Chips
Apple chips are a healthy, crunchy snack that are easy to make and store.
Ingredients:
4 apples (preferably sweet varieties like Honeycrisp or Fuji)
1 tsp ground cinnamon
1 tbsp lemon juice
Instructions:
Slice the apples thinly, about 1/8-inch thick.
Toss the slices in lemon juice to prevent browning.
Sprinkle ground cinnamon evenly on the apple slices.
Lay the slices on dehydrator trays in a single layer, making sure they do not overlap.
Set the dehydrator at 135°F (57°C) for 6–8 hours, or until the apples are crisp.
Once done, store them in an airtight container for up to a month.
2.Dehydrated Vegetable Chips
An excellent alternative to potato chips, dehydrated vegetable chips are nutritious and easy to prepare.
Ingredients:
2 zucchinis
1 large sweet potato
2 beets
1 tbsp olive oil
Salt and pepper to taste
Optional: Garlic powder, paprika, or rosemary for extra flavor
Instructions:
Thinly slice the vegetables into uniform rounds (about 1/8-inch thick).
Toss the slices in olive oil and season with salt, pepper, and other optional spices.
Arrange the slices in a single layer on dehydrator trays.
Dehydrate at 125°F (52°C) for 6–10 hours, depending on the thickness of the slices.
Once crisp, let them cool before storing in an airtight container.
3.Dehydrated Beef Jerky

Homemade beef jerky is a protein-packed snack with endless flavor possibilities.
Ingredients:
1 lb lean beef (such as top round or flank steak)
1/4 cup soy sauce
1 tbsp Worcestershire sauce
1 tsp garlic powder
1 tsp onion powder
1/2 tsp black pepper
1 tsp smoked paprika
1 tbsp brown sugar
Optional: Red pepper flakes for heat
Instructions:
Thinly slice the beef against the grain, about 1/4-inch thick.
In a bowl, mix soy sauce, Worcestershire sauce, garlic powder, onion powder, pepper, paprika, and brown sugar to create the marinade.
Marinate the beef slices for at least 4 hours, preferably overnight.
Lay the beef slices on dehydrator trays, ensuring they don’t overlap.
Set the dehydrator to 160°F (71°C) and dry for 4–8 hours, or until the jerky is firm but slightly bendable.
Store the jerky in a sealed container for up to a month.
4.Dehydrated Tomato Powder
Tomato powder is a versatile ingredient that can be used to enhance soups, sauces, and marinades.
Ingredients:
10 ripe tomatoes
Instructions:
Slice the tomatoes into 1/4-inch thick rounds.
Arrange them in a single layer on dehydrator trays.
Dehydrate at 135°F (57°C) for 8–12 hours, or until completely dry and crisp.
Once dried, grind the tomatoes into a fine powder using a food processor or spice grinder.
Store the tomato powder in an airtight jar for up to a year. It can be used to thicken soups, add flavor to sauces, or even make instant tomato paste by mixing with water.
5.Dehydrated Fruit Leather
Fruit leather is a fun and healthy snack that’s great for kids and adults alike.
Ingredients:
4 cups fresh fruit (berries, peaches, apples, or mango)
2 tbsp honey or maple syrup (optional)
Instructions:
Puree the fruit in a blender until smooth.
If desired, sweeten the puree with honey or maple syrup.
Spread the fruit puree evenly over a non-stick dehydrator sheet, about 1/8-inch thick.
Dehydrate at 135°F (57°C) for 6–10 hours, or until the fruit leather is no longer sticky to the touch and peels easily from the sheet.
Once done, cut into strips and roll up in parchment paper. Store in an airtight container for up to a month.
6.Dehydrated Mushroom Risotto Kit
This DIY risotto kit is a fantastic way to prepare a gourmet meal, especially for camping trips or emergency meals.
Ingredients:
1 cup Arborio rice
1/2 cup dehydrated mushrooms (such as shiitake or cremini)
1 tbsp dehydrated onion
1 tbsp dehydrated garlic powder
1/4 cup grated Parmesan cheese (optional)
Salt and pepper to taste
Instructions:
Combine all dry ingredients in a zip-lock bag or airtight container.
To prepare, bring 4 cups of water to a boil and add the risotto kit.
Simmer for 18–20 minutes, stirring frequently, until the rice is tender and creamy. Adjust water if necessary.
Serve with a sprinkle of Parmesan cheese for added flavor.
Conclusion
Dehydrating foods opens up a world of culinary possibilities. Not only does it extend the shelf life of your ingredients, but it also allows you to craft nutrient-dense, flavorful meals and snacks. Whether you’re making crispy apple chips, beef jerky, or a homemade risotto kit, dehydrated foods provide convenience and versatility that can be enjoyed at home, on the go, or during outdoor adventures. Start experimenting with dehydration today, and discover how easy and rewarding it can be to create your own pantry full of nutritious delights!
What can you use dehydrated food for?
Recipes For Dehydrated Foods is a versatile ingredient that offers numerous uses in both daily life and special occasions. With its extended shelf life, lightweight nature, and concentrated nutrients, dehydrated food can become a staple in your kitchen and pantry. Here are several creative and practical ways to use dehydrated food:
1.Healthy Snacking
One of the most common uses for dehydrated food is for healthy, convenient snacks. Dehydrated fruits like apple chips, banana slices, and mango strips are naturally sweet and packed with nutrients, making them perfect for on-the-go munching. Dehydrated vegetable chips made from zucchini, sweet potatoes, or kale are great alternatives to processed snacks. These snacks are easy to make at home, preservative-free, and much healthier than store-bought options.
2.Meal Preparation for Camping and Hiking
Dehydrated food is a go-to option for outdoor enthusiasts because it’s lightweight and doesn’t require refrigeration. Whether you’re backpacking, camping, or hiking, you can pack dehydrated meals that are easy to rehydrate and cook. Dried vegetables, beef jerky, and even pre-made meal kits like dehydrated soups or stews can be carried in small quantities and rehydrated with water, providing quick and satisfying meals in remote areas.
3.Long-Term Food Storage
Dehydrated food is ideal for emergency preparedness. Because it can last for months or even years when properly stored, it’s a crucial element in any long-term food storage plan. Stocking up on dehydrated fruits, vegetables, grains, and meats ensures that you’ll have nutritious food available in case of natural disasters, power outages, or supply chain disruptions. You can also create your own homemade emergency meal kits using various dehydrated ingredients.
4.Enhancing Everyday Cooking
Dehydrated ingredients can add intense flavor and nutrition to everyday meals. For example, dehydrated mushrooms or tomatoes can be tossed into soups, stews, and sauces to enhance their depth of flavor. Dehydrated garlic or onions can be rehydrated and used in stir-fries, casseroles, or marinades. The best part is that they are ready to use without needing to chop or prepare fresh ingredients, saving you valuable prep time in the kitchen.
5.Homemade Seasonings and Powders
Dehydrated foods can be ground into powders that make for excellent seasonings and flavor enhancers. Dehydrated vegetables like bell peppers, tomatoes, and spinach can be processed into powders that add a nutritional boost to any dish. Dehydrated herbs like basil or oregano can be ground and used to flavor pasta, meats, or sauces. Tomato powder, for example, is a versatile ingredient that can be used to make instant tomato paste or added to soups and stews for extra richness.
6.DIY Meal Kits
Recipes For Dehydrated Foods Creating your own dehydrated meal kits is not only cost-effective but also allows you to control the ingredients and portions. You can combine dehydrated ingredients like vegetables, rice, quinoa, or beans to create meals that can be quickly rehydrated and cooked when needed. These meal kits are perfect for busy weeknights or for when you’re traveling and want to avoid fast food options.
Conclusion
Dehydrated food offers numerous benefits beyond simple preservation. From healthy snacks to emergency meal kits, it provides convenience, nutrition, and versatility in the kitchen. Whether you’re an outdoor enthusiast, meal prepper, or just looking for creative ways to incorporate new ingredients into your cooking, dehydrated food has a wide range of uses to explore.
How do you dehydrate whole meals?
Dehydrating whole meals is an effective way to preserve food, reduce weight for travel or camping, and extend the shelf life of leftovers. While dehydrating fruits, vegetables, or meats separately is common, the process of dehydrating entire meals is a practical solution for those who want convenient, ready-to-eat meals that can be rehydrated quickly. Whether you’re preparing meals for backpacking, camping, or long-term storage, dehydrating whole meals ensures you can enjoy home-cooked dishes anywhere.
Here’s a step-by-step guide on how to dehydrate whole meals:
1.Choose Suitable Meals for Dehydration
Not every meal is suitable for dehydration. Some meals, especially those with high-fat content, dairy, or thick creams, don’t dehydrate well because fats can go rancid quickly, shortening the shelf life. However, meals like soups, stews, pasta, casseroles, rice dishes, and chili are perfect for dehydrating.
Good meal options for dehydration include:
Soups and stews (without large fat content)
Pasta dishes with tomato-based sauces
Rice or quinoa-based meals
Casseroles and stir-fries (avoiding heavy dairy or fatty meats)
Bean dishes like chili or lentil soup
2.Cook the Meal as Usual
The first step is to cook your meal just as you normally would. You don’t need to make any major changes to your cooking process, but avoid using excessive oils, butter, or dairy. If your recipe calls for ingredients like sour cream or cheese, it’s best to add those later when rehydrating, if possible. The goal is to cook the meal fully, making sure all ingredients are tender and well-seasoned.
3.Cool and Prepare for Dehydration
Once your meal is fully cooked, allow it to cool down to room temperature. Spread the meal into smaller pieces if necessary—larger chunks of meat or vegetables can take longer to dehydrate. By cutting everything into bite-sized portions, you ensure faster and more even drying.
4.Spread Evenly on Dehydrator Trays
Place the cooled meal on dehydrator trays, making sure to spread it out evenly and in a single layer. If you’re dehydrating liquid-based meals like soup or stew, it’s best to use non-stick dehydrator sheets or parchment paper to avoid spills.
For soups, you can drain excess liquid and dehydrate the solid components separately. Alternatively, you can pour the soup in thin layers on the tray and let the dehydration process reduce it into a dry, brittle layer that can be crumbled.
5.Dehydrate at the Right Temperature
Set your dehydrator to the appropriate temperature. Most whole meals should be dehydrated at 135°F (57°C), which is the recommended setting for fruits, vegetables, and cooked meals. If your meal contains meat, you may want to dehydrate it at a slightly higher temperature, around 145°F (63°C), to ensure safety.
Dehydrating a whole meal can take anywhere from 6 to 12 hours, depending on the ingredients and the thickness of the food on the trays. It’s important to check your meal periodically to make sure it’s drying evenly. Stirring or rotating the trays halfway through the process can help ensure that no areas are left under-dried.
6.Check for Dryness
Once the dehydration process is complete, check the meal for dryness. Everything should be completely dry and brittle. Vegetables and pasta should snap easily, while meats should feel dry and not oily to the touch. If any portion of the meal feels soft or spongy, it’s a sign that it’s not fully dehydrated and needs more time in the dehydrator.
7.Store Properly
Proper storage is key to maintaining the longevity of your dehydrated meals. Once your meal is fully dehydrated, allow it to cool completely before storing it. Place the dehydrated meal in an airtight container or vacuum-sealed bag. Mylar bags with oxygen absorbers are also great for long-term storage, as they keep out moisture and air, which can degrade the food over time.
For short-term use (like a week-long camping trip), you can simply store the meal in zip-lock bags. For long-term storage, vacuum sealing or using an airtight jar is essential to ensure your meal stays fresh.
8.Rehydrating Your Meal
When you’re ready to enjoy your dehydrated meal, simply add hot water and let it sit until fully rehydrated. The amount of water and time needed for rehydration will depend on the type of meal and how dry it is. Most meals rehydrate within 10–20 minutes.
For example, soups and stews typically require enough boiling water to cover the dehydrated ingredients, while pasta dishes or rice may need a little less. Stir the meal occasionally to help distribute the water evenly and to avoid clumps.
Conclusion
Dehydrating whole meals is a convenient way to prepare for camping trips, long hikes, or emergency food storage. It offers the ability to enjoy homemade meals anywhere without compromising flavor or nutrition. By following the steps outlined above—choosing the right meals, cooking them properly, dehydrating at the correct temperature, and storing them safely—you can create a pantry full of nutritious, ready-to-eat meals that are easy to rehydrate and enjoy wherever you are.
How to dehydrate food faster?
Dehydrating food is an excellent way to preserve nutrients, extend shelf life, and reduce waste. However, the process can sometimes be time-consuming, especially when drying certain fruits, vegetables, or meats. If you’re looking to speed up the dehydration process without sacrificing quality or nutritional value, here are several practical techniques and tips to help you dehydrate food faster.
1.Use a Higher Temperature
Dehydrating food at a higher temperature can significantly reduce the time required to dry it. Most food dehydrators come with adjustable temperature settings, allowing you to set the heat based on the food you’re drying. For faster results:
Fruits and vegetables can typically be dehydrated at 135°F (57°C).
Meats (for making jerky) can be dehydrated at 145°F (63°C).
Herbs and delicate greens require lower temperatures (around 95°F or 35°C), but if you’re in a hurry, bumping it up slightly can still work.
While it’s tempting to crank the temperature up even higher, doing so may “cook” the outer layers of the food, causing them to harden while trapping moisture inside—a phenomenon known as “case hardening.” This can lead to uneven drying and potentially spoil the food. Be cautious not to go overboard with heat.
2.Slice Food Thinly and Uniformly
Thinner slices dry faster because they have less moisture to remove compared to thicker chunks. A good rule of thumb is to slice fruits and vegetables between 1/8 to 1/4 inch thick. Using a mandoline slicer or a food processor ensures that your food is cut evenly, which speeds up the dehydration process and promotes uniform drying.
Meats should also be sliced thinly (around 1/4 inch) to ensure quick and even drying. If your food pieces are uniform in size and thickness, they’ll dehydrate at the same rate, reducing the overall drying time.
3.Pre-treat Foods
Some foods benefit from pre-treating methods that can help speed up dehydration:
Blanching vegetables: Vegetables like carrots, broccoli, and beans can be blanched for a minute or two in boiling water before dehydrating. Blanching breaks down cell walls, allowing moisture to escape more quickly.
Pre-drying fruits: For fruits with high water content (such as apples, pears, and peaches), dipping them in lemon juice or ascorbic acid can reduce oxidation and help release moisture faster.
Marinating meats: For jerky, marinating in salt or acidic solutions (like vinegar) can break down the fibers and allow the meat to dry more quickly.
4.Increase Airflow
Good airflow is critical to efficient dehydration. Dehydrators with built-in fans circulate air evenly, reducing drying time. If your dehydrator doesn’t have a fan, or if you’re using an oven, you can increase airflow by:
Using a fan: Point a small fan toward your dehydrator or oven to help air circulate.
Leaving the oven door slightly open: If you’re dehydrating food in the oven, propping the door open with a wooden spoon can allow moisture to escape and improve airflow.
Increased airflow helps prevent moisture from accumulating around the food, speeding up the drying process.
5.Rotate Trays
In dehydrators that don’t have automatic rotation or even heat distribution, rotating trays periodically can help ensure all pieces of food dry at the same rate. Moisture tends to build up on the bottom trays due to gravity, so swapping the bottom trays with those at the top or middle will help all the pieces dry more evenly and quickly.
6.Avoid Overloading Trays
While it’s tempting to load as much food as possible into your dehydrator, overcrowding can slow down the drying process. When pieces of food overlap or are packed too closely together, they block airflow, causing moisture to stay trapped. To avoid this, make sure there is enough space between each piece of food so air can circulate freely.
7.Use a Dehydrator with a Fan and Adjustable Settings
Investing in a high-quality food dehydrator with a built-in fan and adjustable temperature settings will dramatically improve drying efficiency. Dehydrators with horizontal airflow (like the Excalibur models) distribute heat and air evenly, reducing the need for rotating trays and cutting down dehydration time.
If you’re serious about dehydrating food quickly, upgrading to a dehydrator that offers more control over temperature and airflow can save you hours of drying time.
8.Start with Smaller Batches
Dehydrating smaller batches of food can reduce drying time. If you’re in a hurry or don’t need to dehydrate large quantities, drying smaller amounts will allow moisture to evaporate more quickly. Larger batches trap moisture longer because they generate more steam during dehydration.
9.Opt for Pre-dried Ingredients
For certain meals or snacks, using pre-dried ingredients can cut down on the overall dehydration time. For example, if you’re making jerky, consider using lean cuts of meat that have less moisture content. Similarly, dried beans or legumes can be quicker to dehydrate when used in prepared meals.
Conclusion
Recipes For Dehydrated Foods faster doesn’t have to compromise quality. By adjusting temperature settings, slicing food thinly, increasing airflow, and using pre-treatment methods, you can speed up the dehydration process while still producing high-quality results. Whether you’re preparing food for long-term storage, camping trips, or simply want quick and healthy snacks, these techniques will help you dehydrate food faster and more efficiently. Discover foods that help reduce migraines: leafy greens, fatty fish, almonds, seeds, whole grains, and magnesium-rich foods for natural relief. Foods that can trigger joint inflammation include processed sugars, refined carbs, red and processed meats, trans fats, and excessive alcohol. Avoid these to ease joint pain.
As an Amazon Associate, We earn from qualifying purchases. When you purchase a product through Amazon links on kitchenadvising.com, we may earn a small commission at no extra cost to you. This helps support the site and keep our content free.