
Introduction:
How To Use A Stove Top Espresso Maker often referred to as a “Moka pot,” is a cherished tradition that delivers a rich and aromatic espresso right at home. This classic method, popularized by Italian coffee culture, is both simple and rewarding, offering a deep, robust coffee experience. Whether you’re new to using a stovetop espresso maker or looking to refine your technique, this guide will walk you through the process, ensuring a perfect brew every time.

What You’ll Need:
Stovetop espresso maker (Moka pot)
Finely ground coffee
Filtered water
Stove
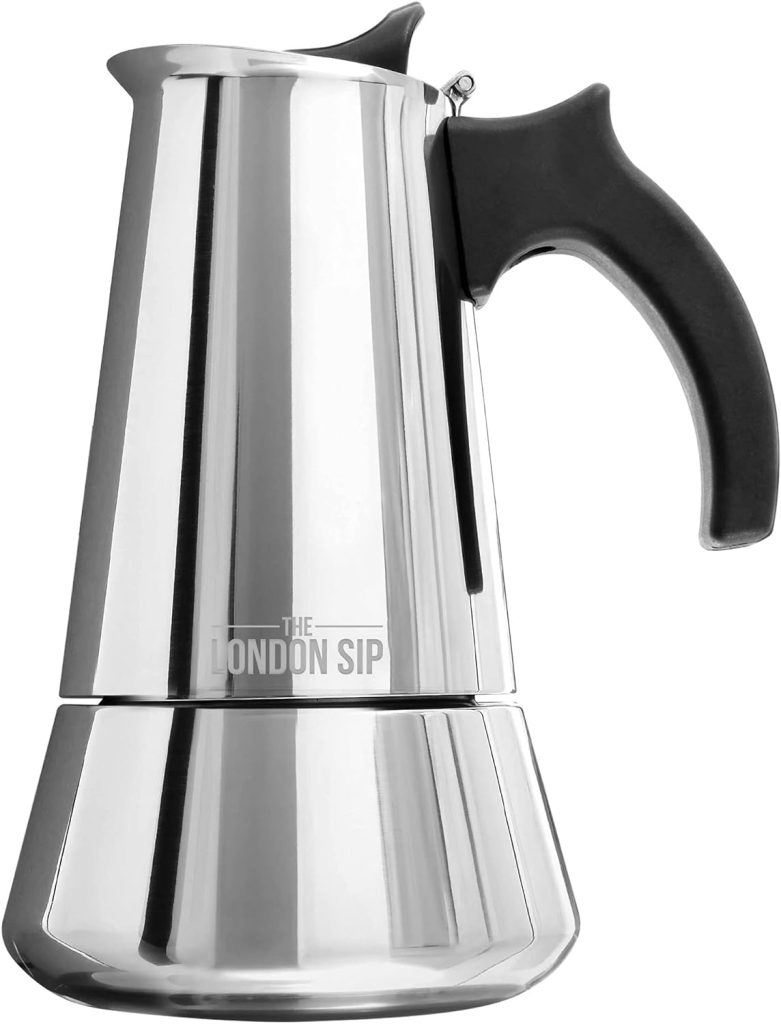
Step 1: Understand the Anatomy of Your Moka Pot
Before you begin, it’s important to familiarize yourself with the components of the stovetop espresso maker:
Bottom Chamber: Holds the water.
Filter Basket: Where you place the ground coffee.
Top Chamber: Collects the brewed coffee.
Step 2: Fill the Bottom Chamber with Water
Start by unscrewing the top and removing the filter basket from the Moka pot. Fill the bottom chamber with filtered water up to the safety valve. Avoid overfilling, as this could affect the brewing process and result in a weaker coffee.
Pro Tip: Use hot water to reduce brewing time and prevent overheating the coffee, which can cause a bitter taste.
Step 3: Add Coffee Grounds to the Filter Basket
Next, fill the filter basket with finely ground coffee. The grind size should be finer than that for a drip coffee maker but not as fine as for espresso machines. Level the coffee grounds with your finger, ensuring they are evenly distributed. Avoid pressing the grounds down, as this can lead to over-extraction and a bitter brew.
Pro Tip: Use freshly ground coffee for the best flavor.
Step 4: Assemble the Moka Pot
Place the filter basket back into the bottom chamber, ensuring it sits flat. sure it’s tight enough to prevent leaks but not so tight that it’s difficult to unscrew later.
Step 5: Heat the Moka Pot
Place the assembled Moka pot on the stove over medium heat. The water in the bottom chamber will start to heat up and create pressure, forcing the water through the coffee grounds and into the top chamber. You’ll hear a hissing or gurgling sound as the coffee begins to brew.
Pro Tip: Keep the heat low to medium. Too high a heat can cause the coffee to brew too quickly, resulting in a burnt flavor.
Step 6: Monitor the Brewing Process
As the coffee begins to fill the top chamber, keep an eye on it. Once you hear a sputtering sound and see that the top chamber is nearly full, remove the Moka pot from the heat. This indicates that the brewing process is complete.
Pro Tip: For a smoother coffee, you can quickly run the bottom chamber under cold water to stop the brewing process immediately.
Step 7: Serve and Enjoy
Pour the freshly brewed espresso into your favorite cup and enjoy it as is, or use it as a base for various coffee drinks like lattes or cappuccinos.
Pro Tip: Clean your Moka pot after each use by rinsing it with warm water. Avoid using soap, as it can leave a residue that affects the flavor of future brews.
Conclusion: Perfecting Your Brew
Using a stovetop espresso maker is an art that combines precision with a love for coffee. With a bit of practice, you’ll master the technique, creating rich and aromatic espresso that rivals any café. Whether you enjoy it straight or with milk, the satisfaction of brewing your own espresso on the stove is unparalleled. Experiment with different grind sizes, coffee varieties, and brewing times to find your perfect cup. Happy brewing!
How to make coffee with a stovetop espresso maker?
The stovetop espresso maker, or Moka pot, is a beloved tool for brewing strong, flavorful coffee at home. This method, rooted in Italian tradition, produces a rich espresso-like coffee that serves as a perfect pick-me-up or a base for various coffee beverages. If you’re new to this classic brewing method, here’s a step-by-step guide on how to make coffee with a stovetop espresso maker.
What You’ll Need:
Stovetop espresso maker (Moka pot)
Finely ground coffee
Filtered water
Stove
Coffee cup
Step 1: Familiarize Yourself with the Moka Pot
Before you start brewing, take a moment to understand the components of your Moka pot:
Bottom Chamber: This is where the water is stored.
Filter Basket: This holds the ground coffee.
Top Chamber: This is where the brewed coffee will collect.
Step 2: Add Water to the Bottom Chamber
Begin by unscrewing the top chamber from the bottom. Remove the filter basket and fill the bottom chamber with filtered water up to just below the safety valve. Overfilling can lead to improper brewing, so be sure to stay below the valve.
Tip: Using preheated water can reduce brewing time and help prevent the coffee from tasting burnt.
Step 3: Prepare the Coffee Grounds
Fill the filter basket with finely ground coffee. The grind should be finer than what you’d use for drip coffee but coarser than espresso machine grounds. Level the coffee grounds by gently tapping the sides of the basket or using your finger, but do not press the coffee down.
Tip: For the best flavor, use freshly ground coffee beans.
Step 4: Assemble the Moka Pot
Place the filter basket back into the bottom chamber, ensuring it fits snugly. Screw the top chamber onto the bottom chamber tightly, but not overly so, to avoid damaging the rubber gasket.
Step 5: Heat the Moka Pot
Place the Moka pot on the stove over medium heat. As the water heats up, it will create steam and pressure, forcing the water through the coffee grounds and into the top chamber. You’ll hear a hissing or bubbling sound as the coffee begins to brew.
Tip: Use medium heat to control the brewing speed and avoid burning the coffee.
Step 6: Monitor the Brewing Process
Keep a close eye on the Moka pot as it brews. When the top chamber is filled with coffee and you hear a sputtering sound, the brewing process is nearly complete. Remove the Moka pot from the heat to avoid over-extraction, which can lead to a bitter taste.
Tip: If you want to halt the brewing process quickly, run the bottom chamber under cold water.
Step 7: Serve and Enjoy
Pour the freshly brewed coffee into your cup. You can enjoy it as a strong espresso-style drink or use it as a base for lattes, cappuccinos, or other coffee beverages.
Tip: For an authentic Italian touch, enjoy your coffee with a small piece of dark chocolate or a biscotti.
Step 8: Clean Your Moka Pot
After you’ve enjoyed your coffee, clean the Moka pot by rinsing all its components with warm water. Avoid using soap, as it can leave a residue that may affect the flavor of future brews.
Conclusion: Mastering the Stovetop Espresso Maker
Brewing coffee with a stovetop espresso maker is a delightful ritual that delivers a rich and satisfying cup every time. With a few simple steps, you can create a coffee experience that’s both traditional and tailored to your taste. Whether you prefer your coffee black or with a splash of milk, the Moka pot offers a versatile and reliable way to enjoy high-quality coffee at home. Experiment with different coffee blends and grind sizes to find your perfect brew, and enjoy the timeless pleasure of stovetop coffee making.

How long does a stove top espresso maker take?
How To Use A Stove Top Espresso Maker commonly known as a Moka pot, is a timeless tool for brewing strong and aromatic coffee. While it doesn’t produce espresso in the technical sense, it delivers a rich, full-bodied brew that many coffee lovers cherish. One of the most common questions for beginners is: How long does it take to brew coffee with a stovetop espresso maker?
The Average Brewing Time
Typically, it takes between 5 to 10 minutes to brew coffee using a stovetop espresso maker. However, the exact time can vary based on several factors, including the size of your Moka pot, the amount of heat applied, the water temperature, and the grind size of your coffee. Let’s break down each of these elements to understand their impact on the brewing time.
Factors Influencing the Brewing Time
1.Size of the Moka Pot
Smaller Moka Pots (1-3 cups): These usually take around 5 to 7 minutes to brew. The smaller water volume heats up more quickly, leading to faster coffee extraction.
Larger Moka Pots (6-12 cups): Larger pots may take 7 to 10 minutes due to the increased water volume, which requires more time to reach the necessary pressure for brewing.
2.Heat Level
Low to Medium Heat: Most experts recommend brewing on low to medium heat to ensure a gradual extraction process. This typically takes 6 to 10 minutes. Low heat prevents the coffee from overheating, which can cause bitterness.
High Heat: While high heat can speed up the process to around 4 to 6 minutes, it risks burning the coffee, leading to an over-extracted, bitter taste.
3.Water Temperature
Cold Water: Starting with cold water, the traditional method, will take longer as the pot needs time to heat the water and build pressure. This can take the full 7 to 10 minutes.
Preheated Water: If you start with preheated or hot water, it can shave off a couple of minutes, reducing the total brewing time to around 4 to 6 minutes. This method is also preferred by some to minimize the risk of overheating the coffee grounds.
4.Coffee Grind Size
Fine Grind: A finer grind will brew faster because the water extracts more flavor in a shorter time. However, if the grind is too fine, it can clog the filter and slow down the process, potentially leading to over-extraction.
Medium-Fine Grind: This is the ideal grind size for Moka pots, balancing the extraction rate and brewing time, typically taking around 5 to 7 minutes.
Monitoring the Process
As you brew, it’s crucial to pay attention to the sounds and sights. The coffee begins to brew when the water in the bottom chamber starts boiling and creating pressure. You’ll hear a soft gurgling or hissing sound as the coffee starts to rise into the top chamber. The process is complete when the sputtering sound becomes more pronounced and consistent, signaling that the top chamber is full of brewed coffee. Brew hot and iced coffee effortlessly with versatile coffee makers designed for perfect temperature control.
Troubleshooting: When It Takes Too Long or Too Short
If It Takes Too Long: If your Moka pot takes more than 10 minutes, the heat may be too low, or the grind size might be too fine, causing the coffee to extract too slowly. Consider increasing the heat slightly or adjusting the grind size.
If It Takes Too Short: If the coffee is ready in less than 4 minutes, the heat might be too high, or the water could be preheated too much. This can lead to under-extraction, resulting in a weak or sour coffee. Try reducing the heat and starting with cooler water.
Conclusion: The Perfect Brew Time
While the stovetop espresso maker typically takes between 5 to 10 minutes to brew a pot of coffee, the exact time can vary based on multiple factors. The key is to find the right balance for your preferences, adjusting the heat, water temperature, and grind size to achieve the perfect brew. With practice, you’ll develop a feel for the process, ensuring a consistently delicious coffee experience every time you use your Moka pot. Discover the top 5-cup coffee makers for perfect small-batch brews. Ideal for quick, flavorful coffee at home!
How does a stovetop espresso maker work?
The stovetop espresso maker, commonly known as a Moka pot, is a staple in many coffee-loving households. It’s a simple yet ingenious device that brews rich, strong coffee using the principles of pressure and heat. But how exactly does this classic coffee maker work? Let’s explore the mechanics behind the Moka pot to understand how it transforms water and coffee grounds into a flavorful brew.
The Anatomy of a Stovetop Espresso Maker
Before diving into the process, it’s essential to understand the key components of a Moka pot:
Bottom Chamber (Water Reservoir): This is where you pour the water. It’s designed to withstand high pressure and heat.
Filter Basket (Coffee Basket): This sits on top of the bottom chamber and holds the finely ground coffee.
Top Chamber (Coffee Collector): This is where the brewed coffee collects after passing through the coffee grounds.
Central Tube: The tube that runs through the bottom chamber and allows water to rise through the coffee grounds.
Safety Valve: A small valve on the side of the bottom chamber that releases pressure if it becomes too high, ensuring safe operation.
The Brewing Process: Step-by-Step
1.Filling the Bottom Chamber with Water
The process begins by filling the bottom chamber with water. The water should reach just below the safety valve to ensure there’s enough pressure during brewing but not too much to overflow or interfere with the valve’s operation.
2.Adding Coffee Grounds to the Filter Basket
Next, the filter basket is filled with finely ground coffee. The grind size should be finer than for drip coffee but coarser than for espresso machines. The filter basket is then placed into the bottom chamber, making sure it fits snugly.
3.Assembling the Moka Pot
The top chamber is screwed onto the bottom chamber, sealing the Moka pot. This assembly creates a sealed environment where pressure can build up during the brewing process.
4.Applying Heat
Once assembled, the Moka pot is placed on a stovetop over medium heat. As the water in the bottom chamber heats up, it begins to boil, creating steam. The steam increases the pressure inside the chamber, which forces the hot water up through the central tube.
5.Forcing Water Through the Coffee Grounds
As pressure continues to build, the boiling water is pushed up through the central tube and into the filter basket, where it passes through the coffee grounds. The combination of pressure and hot water extracts the coffee’s oils and flavors, resulting in a rich, concentrated brew.
6.Brewing and Collecting the Coffee
After passing through the coffee grounds, the brewed coffee continues up through the central tube and into the top chamber. The coffee collects here, ready to be poured. You’ll notice a gurgling sound as the last of the water is forced through the grounds—a signal that brewing is complete.
7.Safety Mechanisms
The safety valve is a crucial component of the Moka pot’s design. If the pressure inside the bottom chamber becomes too high (due to overfilling, too fine a grind, or excessive heat), the valve releases some of the pressure, preventing potential accidents.
The Science Behind It: Pressure and Extraction
The stovetop espresso maker operates on the principles of pressure and extraction. As water boils, it turns into steam and increases pressure within the sealed bottom chamber. This pressure is the driving force that pushes the water up through the coffee grounds and into the top chamber. The result is a concentrated coffee, similar in strength to espresso, though not as intense as what’s produced by a high-pressure espresso machine.
Why It Works: The Flavor Extraction
The Moka pot’s ability to create a strong, aromatic coffee lies in its efficient extraction process. The pressurized hot water extracts a higher amount of soluble compounds from the coffee grounds than traditional drip methods. This includes oils, acids, and other flavor components that contribute to the coffee’s rich taste. The longer brewing time compared to espresso machines also allows for a more thorough extraction, resulting in a full-bodied coffee that’s perfect for enjoying on its own or as a base for other coffee drinks.
Conclusion: The Moka Pot’s Timeless Appeal
How To Use A Stove Top Espresso Maker is a testament to simple yet effective design. By harnessing the power of steam and pressure, it brews a robust coffee that’s beloved by many. Whether you’re a coffee connoisseur or just enjoy a strong cup in the morning, understanding how your Moka pot works adds an extra layer of appreciation to each brew. It’s a piece of coffee-making history that continues to deliver satisfying results, one stovetop brew at a time.
As an Amazon Associate, We earn from qualifying purchases. When you purchase a product through Amazon links on kitchenadvising.com, we may earn a small commission at no extra cost to you. This helps support the site and keep our content free.