
Introduction:
Whole Wheat Sandwich Bread Recipe Baking your own bread at home is a rewarding experience, combining the satisfaction of creating something from scratch with the health benefits of knowing exactly what goes into your food. Among the various types of bread, whole wheat sandwich bread stands out for its nutritional value and versatility. In this article, we’ll walk you through a detailed, unique recipe to bake the perfect whole wheat sandwich bread, complete with tips and tricks to ensure success even if you’re a beginner.

Why Whole Wheat?
Whole wheat bread is celebrated for its health benefits. Unlike white bread, which is made from refined flour, whole wheat bread includes the entire grain, providing more fiber, vitamins, and minerals. This makes it a heart-healthy choice, aiding digestion and keeping you full longer.
Ingredients
For a loaf of whole wheat sandwich bread, you will need the following ingredients:
3 1/2 cups whole wheat flour
2 1/4 teaspoons active dry yeast (1 packet)
1 1/2 teaspoons salt
2 tablespoons honey or maple syrup
1 1/4 cups warm water (110°F to 115°F)
2 tablespoons olive oil or melted butter
1/4 cup milk (dairy or plant-based)
Optional: 2 tablespoons vital wheat gluten (improves texture and rise)
Equipment
Mixing bowls
Measuring cups and spoons
A stand mixer with a dough hook (optional but helpful)
A 9×5 inch loaf pan
A kitchen thermometer
A clean kitchen towel
Instructions
1.Activate the Yeast
In a small bowl, combine the warm water and honey. Stir in the yeast and let it sit for about 5-10 minutes until it becomes frothy. This indicates that the yeast is active and ready to use.
2.Mix the Dry Ingredients
In a large mixing bowl, combine the whole wheat flour, salt, and vital wheat gluten if using. Vital wheat gluten is not mandatory, but it helps improve the bread’s texture and rise.
3.Combine Wet and Dry Ingredients
Add the yeast mixture, olive oil or melted butter, and milk to the dry ingredients. Mix until a shaggy dough forms.
4.Knead the Dough
If kneading by hand, turn the dough onto a floured surface and knead for 10-12 minutes until it becomes smooth and elastic.
5.First Rise
Shape the dough into a ball and place it in a greased bowl, turning it once to coat the top. Cover with a clean kitchen towel and let it rise in a warm, draft-free area for about 1-2 hours, or until it has doubled in size.
6.Shape the Loaf
Punch down the risen dough to release any air bubbles. Turn it out onto a lightly floured surface and shape it into a loaf. Place the loaf into a greased 9×5 inch loaf pan, seam side down.
7.Second Rise
Cover the loaf pan with a towel and let the dough rise again in a warm place for about 45 minutes to 1 hour, or until it has risen just above the edge of the pan.
8.Preheat the Oven
Towards the end of the second rise, preheat your oven to 375°F (190°C).
9.Bake
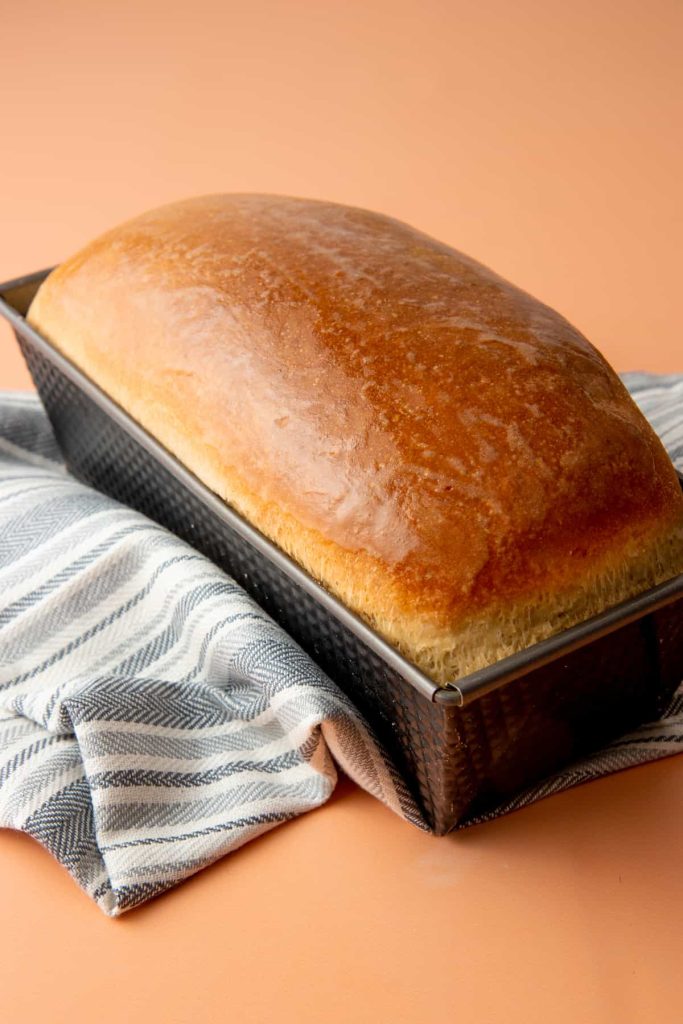
Bake the bread in the preheated oven for 30-35 minutes, or until the top is golden brown and the bread sounds hollow when tapped. For extra assurance, the internal temperature should read 190°F (88°C).
10.Cool
Remove the bread from the oven and let it cool in the pan for about 10 minutes. Then, transfer it to a wire rack to cool completely before slicing. This helps to set the crumb and makes slicing easier.
Tips for Success
Measure Accurately: Baking is a science, so use a kitchen scale for the most accurate measurements, especially for flour.
Knead Well: Proper kneading develops gluten, which gives bread its structure.
Don’t Rush the Rise: Allowing the dough to rise fully in both the first and second rise is crucial for a light, airy loaf.
Variations
Seeded Bread: Add 1/4 cup of mixed seeds (like sunflower, flax, or chia) to the dough for extra texture and nutrition.
Honey Oat Bread: Brush the top of the loaf with a little honey and sprinkle with oats before the second rise for a decorative and tasty finish.
Conclusion
Baking whole wheat sandwich bread at home is a fulfilling and nutritious endeavor. With this detailed recipe and some practice, you’ll be able to produce loaves that are not only healthier but also far superior in taste to store-bought bread. Enjoy the process and the delicious results!
How do you know when sandwich bread is done?
Whole Wheat Sandwich Bread Recipe Baking your own bread at home is a rewarding experience, combining the satisfaction of creating something from scratch with the health benefits of knowing exactly what goes into your food. Among the various types of bread, whole wheat sandwich bread stands out for its nutritional value and versatility. In this article, we’ll walk you through a detailed, unique recipe to bake the perfect whole wheat sandwich bread, complete with tips and tricks to ensure success even if you’re a beginner.
Why Whole Wheat?
Whole wheat bread is celebrated for its health benefits. Unlike white bread, which is made from refined flour, whole wheat bread includes the entire grain, providing more fiber, vitamins, and minerals. This makes it a heart-healthy choice, aiding digestion and keeping you full longer.
Ingredients
For a loaf of whole wheat sandwich bread, you will need the following ingredients:
3 1/2 cups whole wheat flour
2 1/4 teaspoons active dry yeast (1 packet)
1 1/2 teaspoons salt
2 tablespoons honey or maple syrup
1 1/4 cups warm water (110°F to 115°F)
2 tablespoons olive oil or melted butter
1/4 cup milk (dairy or plant-based)
Optional: 2 tablespoons vital wheat gluten (improves texture and rise)
Equipment
Mixing bowls
Measuring cups and spoons
A stand mixer with a dough hook (optional but helpful)
A 9×5 inch loaf pan
A kitchen thermometer
A clean kitchen towel
Instructions
1.Activate the Yeast
In a small bowl, combine the warm water and honey. Stir in the yeast and let it sit for about 5-10 minutes until it becomes frothy. This indicates that the yeast is active and ready to use.
2.Mix the Dry Ingredients
In a large mixing bowl, combine the whole wheat flour, salt, and vital wheat gluten if using. Vital wheat gluten is not mandatory, but it helps improve the bread’s texture and rise.
3.Combine Wet and Dry Ingredients
Add the yeast mixture, olive oil or melted butter, and milk to the dry ingredients. Mix until a shaggy dough forms.
4.Knead the Dough
If using a stand mixer, knead the dough with the dough hook attachment on medium speed for about 8-10 minutes. If kneading by hand, turn the dough onto a floured surface and knead for 10-12 minutes until it becomes smooth and elastic.
5.First Rise
Shape the dough into a ball and place it in a greased bowl, turning it once to coat the top. Cover with a clean kitchen towel and let it rise in a warm, draft-free area for about 1-2 hours, or until it has doubled in size.
6.Shape the Loaf
Punch down the risen dough to release any air bubbles. Turn it out onto a lightly floured surface and shape it into a loaf. Place the loaf into a greased 9×5 inch loaf pan, seam side down.
7.Second Rise
Cover the loaf pan with a towel and let the dough rise again in a warm place for about 45 minutes to 1 hour, or until it has risen just above the edge of the pan.
8.Preheat the Oven
Towards the end of the second rise, preheat your oven to 375°F (190°C).
9.Bake
Bake the bread in the preheated oven for 30-35 minutes, or until the top is golden brown and the bread sounds hollow when tapped. For extra assurance, the internal temperature should read 190°F (88°C).
10.Cool
Remove the bread from the oven and let it cool in the pan for about 10 minutes. Then, transfer it to a wire rack to cool completely before slicing. This helps to set the crumb and makes slicing easier.
Tips for Success
Measure Accurately: Baking is a science, so use a kitchen scale for the most accurate measurements, especially for flour.
Temperature Matters: Ensure your water is warm but not hot to activate the yeast without killing it.
Knead Well: Proper kneading develops gluten, which gives bread its structure.
Don’t Rush the Rise: Allowing the dough to rise fully in both the first and second rise is crucial for a light, airy loaf.
Variations
Seeded Bread: Add 1/4 cup of mixed seeds (like sunflower, flax, or chia) to the dough for extra texture and nutrition.
Honey Oat Bread: Brush the top of the loaf with a little honey and sprinkle with oats before the second rise for a decorative and tasty finish.
Conclusion
Baking whole wheat sandwich bread at home is a fulfilling and nutritious endeavor. With this detailed recipe and some practice, you’ll be able to produce loaves that are not only healthier but also far superior in taste to store-bought bread. Enjoy the process and the delicious results!
What is the purpose of bread in a sandwich?
Whole Wheat Sandwich Bread Recipe are a staple in many diets worldwide, beloved for their convenience, versatility, and endless combinations of flavors. While the fillings often get the spotlight, the bread plays an equally crucial role in making a sandwich a satisfying meal. Understanding the purpose of bread in a sandwich reveals why this humble ingredient is indispensable and highlights its importance in creating the perfect sandwich experience.
Structural Integrity
The primary function of bread in a sandwich is to provide structural integrity. Bread acts as a vessel that holds all the ingredients together, allowing for easy handling and consumption. Without bread, the components of a sandwich would be cumbersome to eat, especially on the go. The type and texture of bread chosen can affect the sandwich’s overall stability, ensuring that it doesn’t fall apart with each bite.
Texture Contrast
Bread adds a vital textural element to sandwiches. Depending on the type of bread used, it can introduce a range of textures from soft and fluffy to crusty and chewy. This contrast is essential for creating a balanced bite. For example, a crusty baguette provides a satisfying crunch when paired with soft fillings like cheese and cold cuts, while a soft, pillowy loaf complements crispy vegetables and tender meats.
Flavor Foundation
While often understated, the flavor of bread contributes significantly to the overall taste profile of a sandwich. Different breads bring distinct flavors to the table. A sourdough loaf adds a tangy depth, whole wheat bread offers a nutty richness, and a brioche bun lends a hint of sweetness. The choice of bread can enhance or complement the flavors of the fillings, elevating the sandwich to new heights.
Nutritional Contribution
Bread also plays a role in the nutritional value of a sandwich. It can be a source of essential nutrients like fiber, protein, vitamins, and minerals, depending on the type of bread used. Whole grain breads, for example, are packed with fiber and nutrients that support digestion and overall health. By choosing nutritious bread options, you can make a sandwich not only delicious but also a balanced meal.
Absorption and Distribution of Moisture
Bread helps manage the moisture content in a sandwich. It acts as a barrier, preventing wet ingredients like tomatoes, pickles, or sauces from making the sandwich soggy. Some breads are particularly good at absorbing and distributing moisture without becoming mushy, maintaining the desired consistency of the sandwich from the first bite to the last.
Versatility and Customization
The variety of breads available offers endless possibilities for customization, catering to different tastes and dietary needs. From gluten-free options to artisanal loaves, the choice of bread can make a sandwich uniquely yours. Whether you prefer a classic white loaf, a hearty rye, or a trendy ciabatta, the bread sets the stage for personal expression in sandwich making.
Cultural and Culinary Significance
Bread in sandwiches also carries cultural and culinary significance. Different cultures have their unique bread types that define their signature sandwiches. Think of the French baguette in a classic jambon-beurre, the Italian ciabatta in a panini, or the Jewish rye in a Reuben. The bread is integral to the identity of these sandwiches, showcasing the diversity and rich culinary traditions around the world.
Conclusion
In summary, bread is far more than a mere container for sandwich fillings. It provides structural support, contributes to texture and flavor, adds nutritional value, manages moisture, and offers endless customization options. The right bread choice can transform a good sandwich into a great one, making it an essential component in the art of sandwich making. Whether you’re crafting a simple PB&J or an elaborate gourmet creation, the bread you choose lays the foundation for a satisfying and memorable sandwich experience.
How long should sandwich bread cool?
Baking your own bread at home is a rewarding process, culminating in the moment when you pull a perfectly browned loaf from the oven. However, one crucial step remains before you can slice into your homemade sandwich bread: cooling. The cooling phase is essential for achieving the best texture, flavor, and sliceability. But how long should sandwich bread cool? Let’s delve into the reasons behind cooling and the ideal cooling time for sandwich bread.

Why Cooling Matters
1.Texture Development
When bread bakes, the heat causes the starches in the flour to gelatinize and the proteins in the gluten to coagulate, giving the bread its structure. As the bread cools, these processes continue to stabilize, resulting in a firm yet tender crumb. Cutting into the bread too soon can lead to a gummy texture because the interior hasn’t set properly.
2.Moisture Redistribution
Cooling allows moisture to redistribute evenly throughout the loaf. Right out of the oven, the outer layers of the bread are dry and the interior is moist. Cooling balances this moisture, making for a more uniformly textured loaf. If you cut into the bread prematurely, the moisture can escape too quickly, leading to a dry and crumbly texture.
3.Flavor Enhancement
Whole Wheat Sandwich Bread Recipe Just like with many other foods, the flavor of bread develops further as it cools. The Maillard reaction, responsible for the bread’s browned crust and complex flavors, continues to influence the taste during cooling. Allowing the bread to cool completely enhances its overall flavor profile.
4.Easier Slicing
A fully cooled loaf is easier to slice. When bread is hot, it is softer and more prone to tearing, resulting in uneven slices. Cooling firms up the bread, allowing for clean, even cuts that are perfect for sandwiches.
Ideal Cooling Time
For the best results, it’s generally recommended to cool sandwich bread for at least 1 to 2 hours. This timeframe ensures that the interior has set properly and that moisture has redistributed evenly. Here’s a breakdown of the cooling process:
1.Immediate Post-Bake
Once you remove the bread from the oven, let it sit in the pan for about 5-10 minutes. This brief resting period allows the bread to firm up slightly, making it easier to transfer without damaging the loaf.
2.Transfer to a Cooling Rack
After the initial resting period, carefully remove the bread from the pan and place it on a wire cooling rack. The cooling rack allows air to circulate around the entire loaf, preventing the bottom from becoming soggy.
3.Full Cooling
Let the bread cool on the rack for the remaining time, ensuring it cools evenly. Avoid the temptation to cut into the bread during this period. Patience is key to achieving the best texture and flavor.
Tips for Cooling Sandwich Bread
Avoid Drafts: Place the cooling bread in a spot that’s free from drafts, as sudden temperature changes can affect the texture.
Covering: If you prefer a softer crust, you can lightly cover the bread with a clean kitchen towel while it cools. This traps some moisture, softening the crust.
Storing: Once fully cooled, store the bread in a bread box, paper bag, or plastic bag to maintain freshness. If not consuming within a few days, consider freezing slices for later use.
Conclusion
Cooling sandwich bread properly is a vital step in the bread-making process. Allowing your loaf to cool for at least 1 to 2 hours ensures that the texture sets, moisture redistributes, and flavors develop to their fullest potential. By exercising a bit of patience, you’ll be rewarded with a loaf that’s perfect for slicing and making delicious sandwiches. Whether you’re a novice baker or a seasoned pro, understanding the importance of cooling will elevate your homemade bread to new heights. Discover classic Italian pasta recipes, from rich Bolognese to creamy Alfredo. Perfect for a comforting, authentic Italian meal at home.”
How to Bake Soft White Sandwich Bread Recipe ever:
There’s something undeniably comforting about a slice of soft, fluffy white sandwich bread. It’s the foundation of countless sandwiches, from classic PB&J to gourmet grilled cheese. Mastering the art of baking the softest white sandwich bread ever is a baking goal worth pursuing. In this guide, we’ll walk you through a recipe that guarantees a delightfully soft loaf every time, along with tips and tricks to perfect your baking technique.
Ingredients
For the softest white sandwich bread, you’ll need the following ingredients:
4 cups all-purpose flour (plus extra for dusting)
1 packet (2 1/4 teaspoons) active dry yeast
1/4 cup granulated sugar
1 1/2 teaspoons salt
1 cup warm milk (110°F to 115°F)
1/4 cup unsalted butter, softened
1 large egg
Optional: 1 tablespoon vital wheat gluten (for extra softness)
Equipment
Mixing bowls
Measuring cups and spoons
Stand mixer with a dough hook (optional but recommended)
9×5 inch loaf pan
Kitchen thermometer
Clean kitchen towel
Instructions
1.Activate the Yeast
In a small bowl, combine the warm milk and sugar. Stir to dissolve the sugar, then sprinkle the yeast over the milk. Let it sit for about 5-10 minutes until it becomes frothy. This step ensures that your yeast is active and ready to help the bread rise.
2.Prepare the Dry Ingredients
In a large mixing bowl or the bowl of a stand mixer, whisk together the flour, salt, and vital wheat gluten if using. Vital wheat gluten helps improve the texture and softness of the bread but is optional.
3.Mix the Dough
Add the activated yeast mixture, softened butter, and egg to the dry ingredients. Mix until a shaggy dough forms. If using a stand mixer, knead with the dough hook attachment on medium speed for about 8-10 minutes. For hand kneading, turn the dough onto a floured surface and knead for 10-12 minutes until smooth and elastic.
4.First Rise
Shape the dough into a ball and place it in a lightly greased bowl, turning it once to coat the top. Cover with a clean kitchen towel and let it rise in a warm, draft-free area for 1 to 1 1/2 hours, or until it has doubled in size.
5.Shape the Loaf
Gently stretch and fold the dough to fit it into a greased 9×5 inch loaf pan. Smooth the top for an even rise.
6.Second Rise
Cover the loaf pan with a towel and let the dough rise again for about 45 minutes to 1 hour, or until it has risen just above the edge of the pan.
7.Preheat the Oven
Preheat your oven to 350°F (175°C) during the final stages of the second rise.
8.Bake the Bread
Bake the loaf in the preheated oven for 25-30 minutes, or until the top is golden brown and the bread sounds hollow when tapped. An internal temperature of 190°F (88°C) is ideal for a perfectly baked loaf.
9.Cool the Bread
Remove the bread from the oven and let it cool in the pan for about 10 minutes. Transfer it to a wire rack to cool completely before slicing. This allows the bread to set properly and makes slicing easier. Delicious recipes using fresh orange juice: refreshing smoothies, zesty marinades, and sweet desserts. Brighten up your dishes naturally!
Tips for Perfectly Soft Bread
Use Room Temperature Ingredients: Ensure that your milk, butter, and egg are at room temperature for better incorporation and a smoother dough.
Proper Kneading: Knead the dough until it’s smooth and elastic. This develops the gluten, which is essential for a soft, airy texture.
Avoid Overbaking: Keep an eye on the bread to avoid overbaking, which can dry it out. Store Properly: Once cooled, store your bread in a bread box, paper bag, or plastic bag to maintain its softness. For longer storage, consider freezing slices.
Variations
Milk Substitutes: For a dairy-free version, substitute the milk with almond milk, soy milk, or oat milk.
Sweetened Bread: Add a touch of honey or cinnamon for a subtly sweet flavor.
Conclusion
Whole Wheat Sandwich Bread Recipe Baking the softest white sandwich bread ever is a rewarding endeavor that yields a deliciously fluffy and tender loaf. With the right ingredients, careful mixing, and proper cooling, you can achieve a bakery-quality bread right in your own kitchen. This recipe not only ensures softness but also allows for customization to suit your preferences. Enjoy your freshly baked bread in a variety of sandwiches or simply toasted with a pat of butter. Happy baking!
As an Amazon Associate, We earn from qualifying purchases. When you purchase a product through Amazon links on kitchenadvising.com, we may earn a small commission at no extra cost to you. This helps support the site and keep our content free.